Welcome to our comprehensive guide on how to create a table of contents in Google Docs. Whether you’re working on an academic paper, a company report, or a personal project, a well-organized table of contents can make navigating through your document a breeze. In this guide, we’ll walk you through the step-by-step process to create and format your table of contents, making it easier than ever to produce a polished and user-friendly document.
1. Creating and Managing a Table of Contents
Easily navigate through your document by incorporating a table of contents. It provides direct links to your titles and headings.
1.1. Insert or Remove a Table of Contents
- Open your Google Docs on your computer.
- Place your cursor where you want the table of contents to appear.
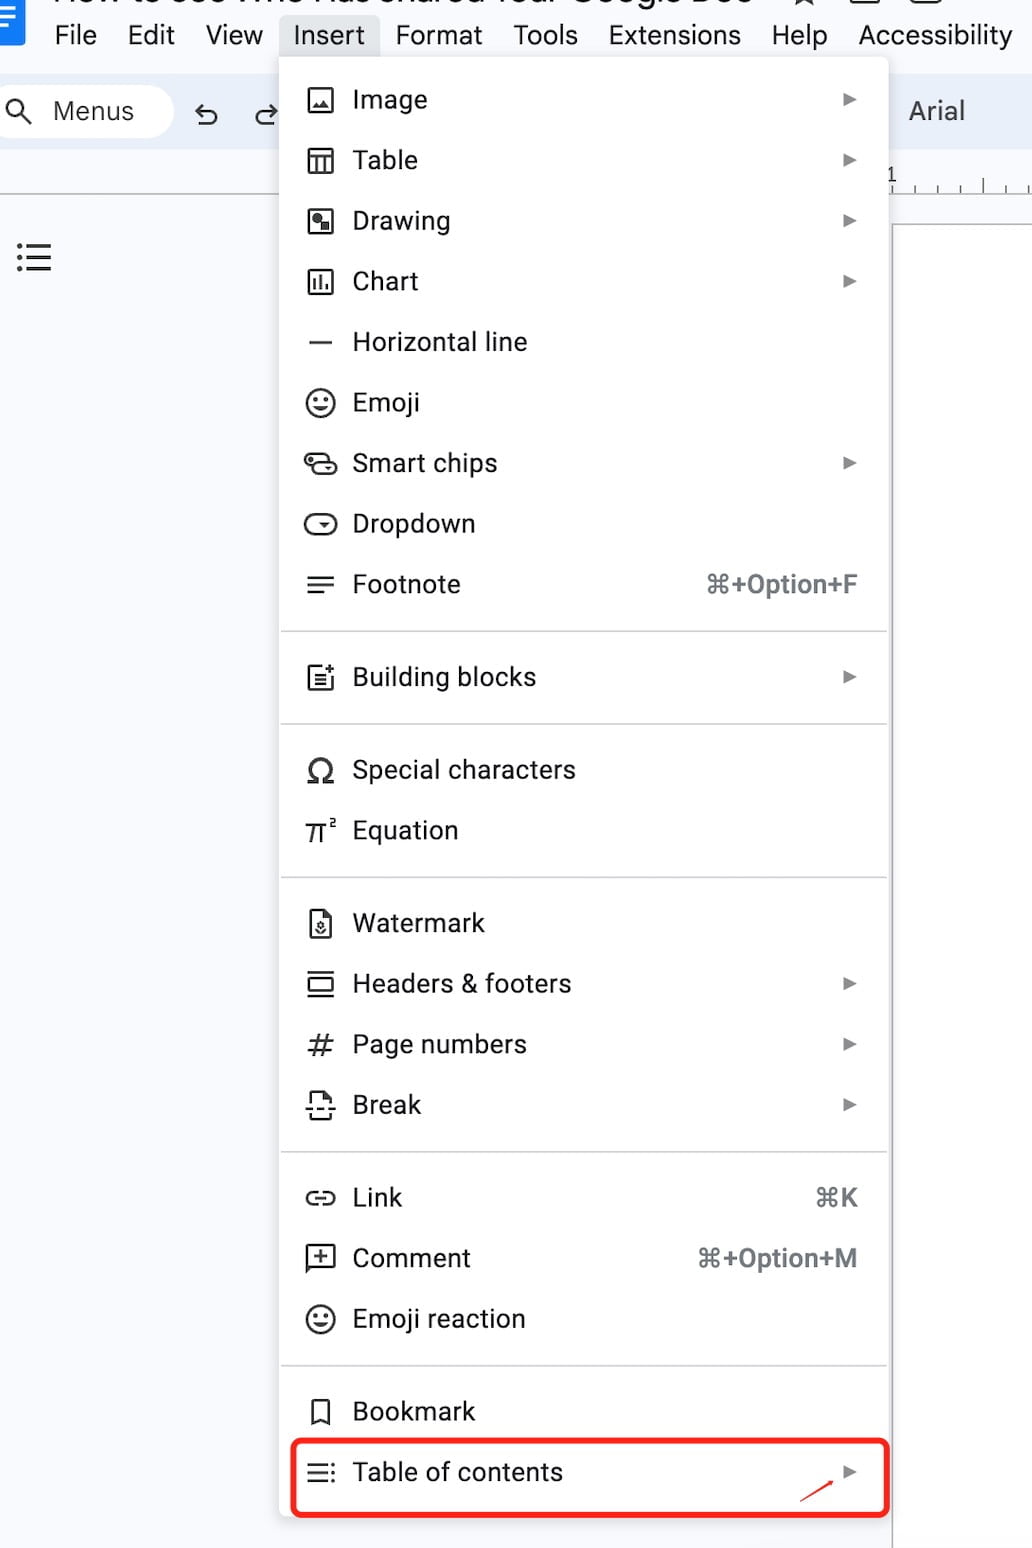
- Go to Insert > Table of Contents and choose your preferred design.

- To remove, right-click on the table of contents and select > Delete table of contents.
1.2. Modify or Update your Table of Contents
You should like to read:
- A Beginner’s Guide How to Convert Microsoft Word to Google Doc
- Step-by-Step Guide: Customize Text, Objects, and Background Colors
- Incorporating Suggested Content in Google Docs: A Practical Guide 2023
- a clear and concise guide on how to use Google Keep
- How to Copy a Page in Google Docs
- Save image from google doc
Updating Titles and Headings:
- Within Google Docs, add or modify a heading.
- Click Refresh on the table of contents to see the updates.
2. Crafting Titles and Headings
2.1. Modify Text Styles
Open your document in Google Docs.
- Highlight the text you wish to style.
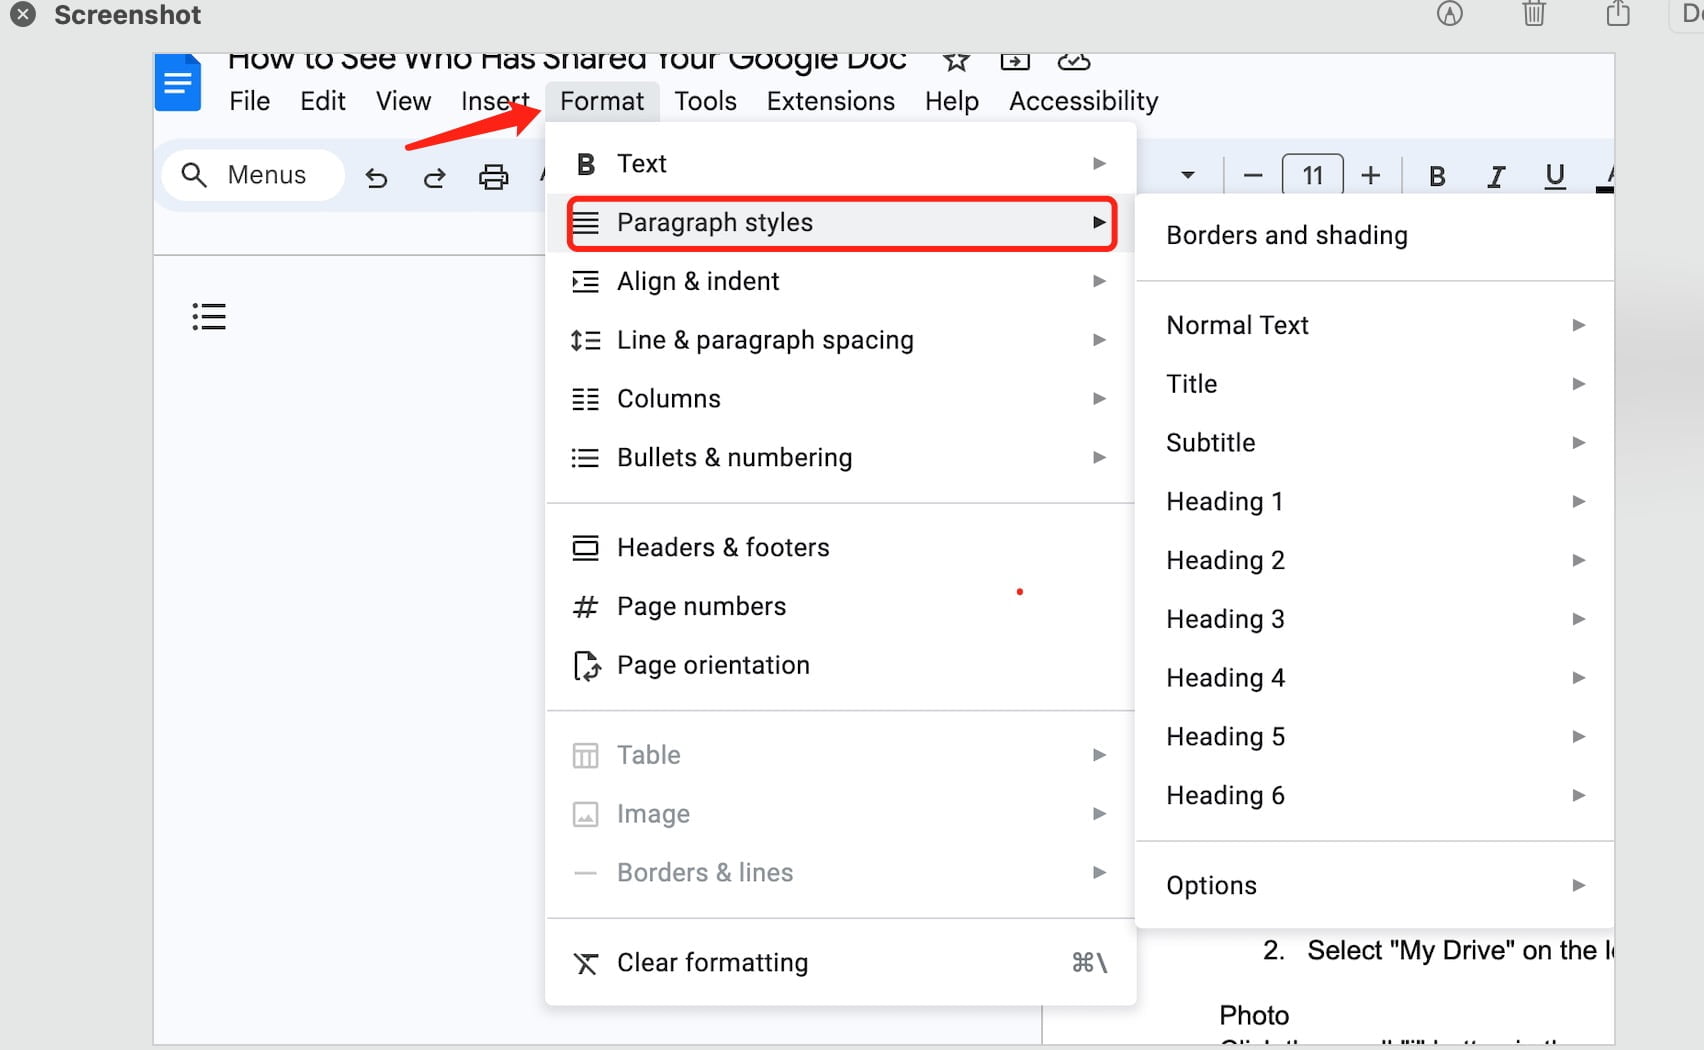
- Navigate to Format > Paragraph styles and choose from:

- Normal text
- Title
- Subtitle
- Heading 1-6
- Select Apply ‘text style’.
2.2. Customize Text Styles
In Google Docs, select a text with your desired style.
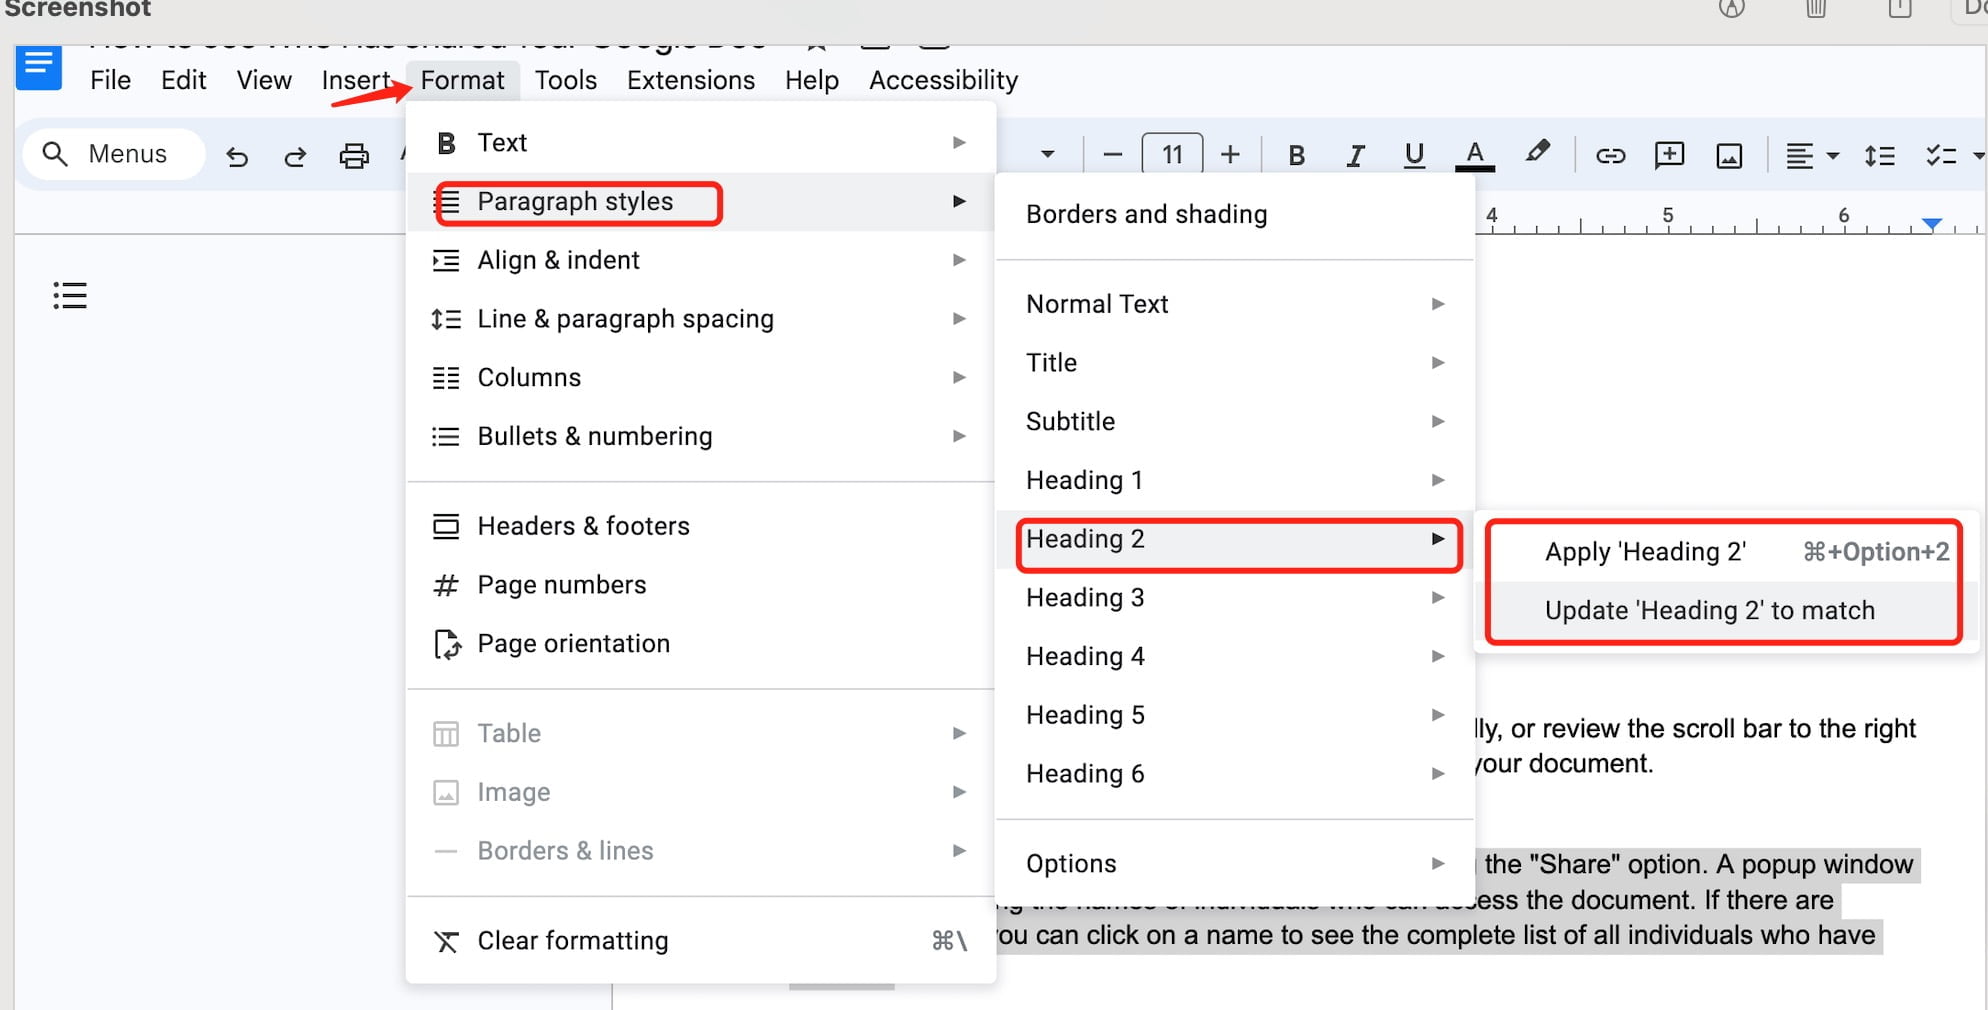
- Go to Format > Paragraph styles > Normal text or Heading 1-6 > Update ‘Heading’ to match.
- All similar text types in the document, like “Heading 4” or “Normal text”, will adjust to your chosen style.

- All similar text types in the document, like “Heading 4” or “Normal text”, will adjust to your chosen style.
Note: Changing the normal text style also modifies the heading fonts.
2.3. Define and Adjust a Default Style
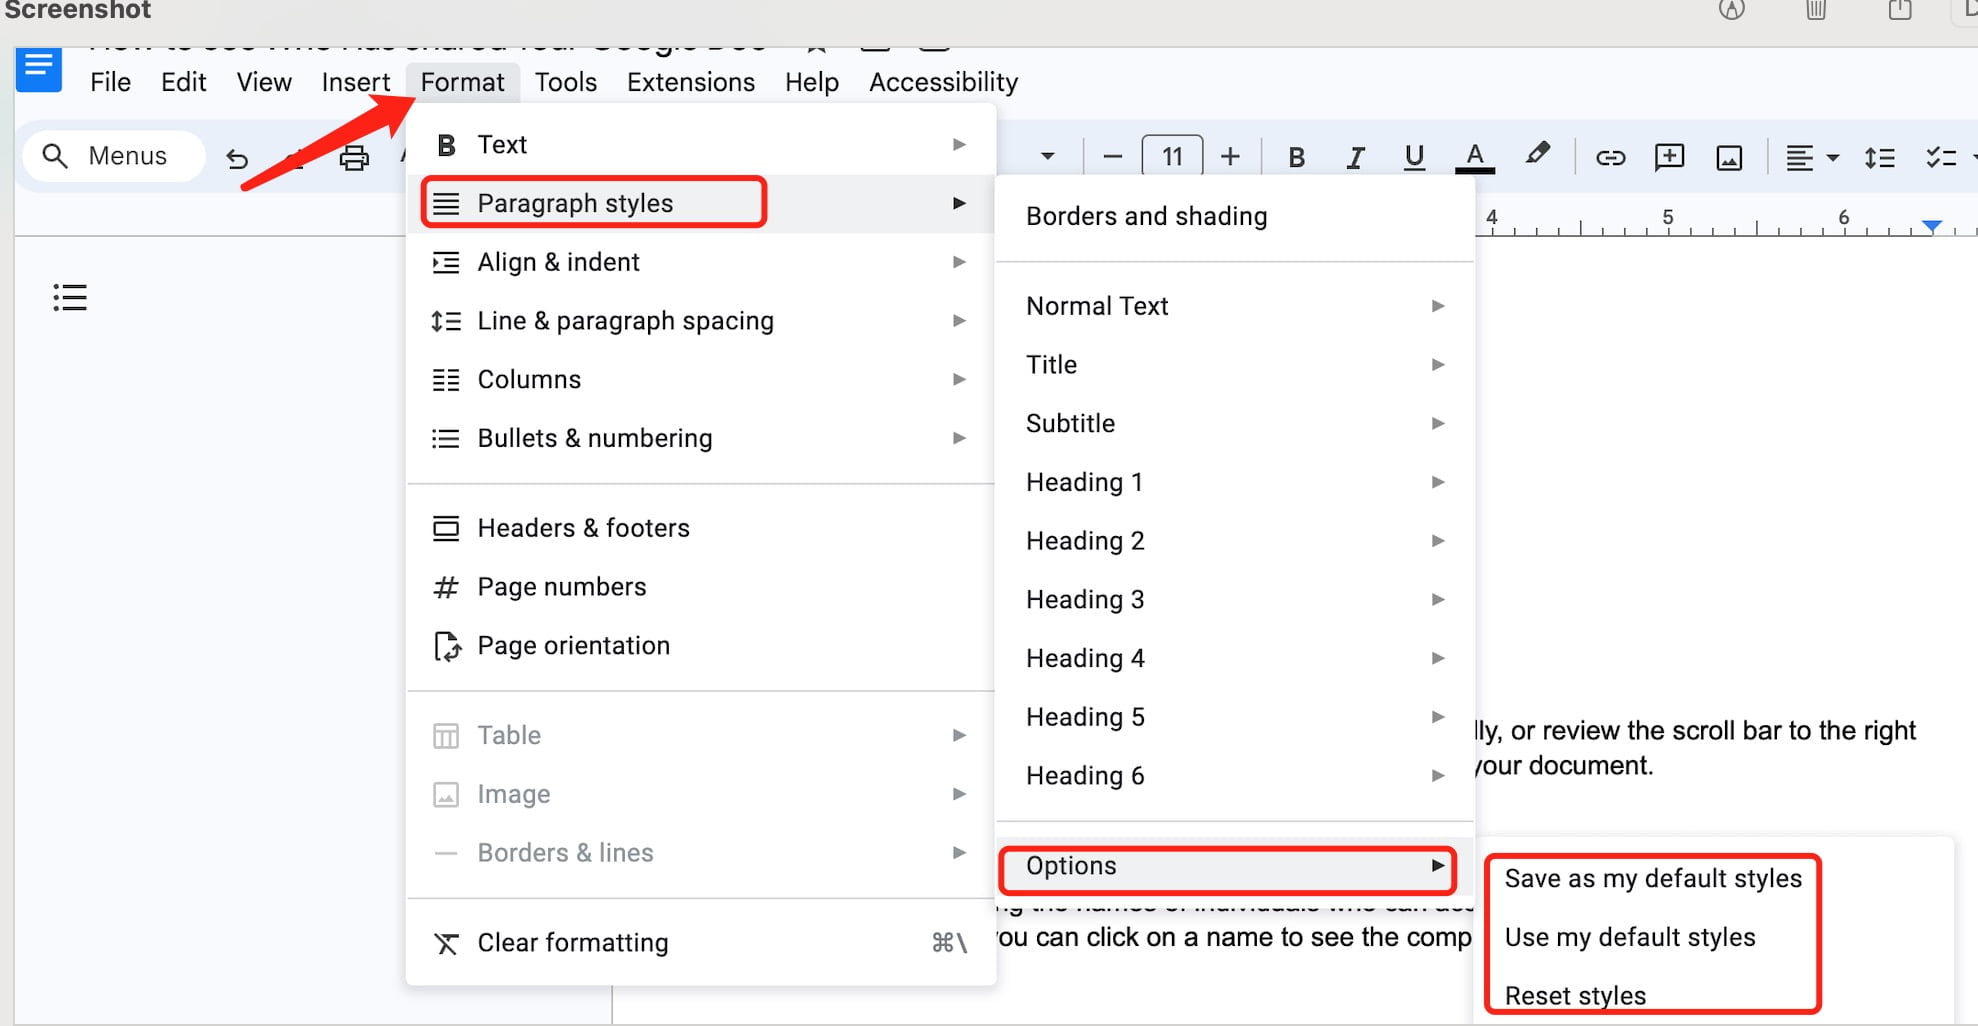
- Within Google Docs, set a default style by going to Format > Paragraph styles > Options > Save as my default styles.
- Apply your default style with Format > Paragraph styles > Options > Use my default styles.
- To revert to the original Google style, select Format > Paragraph styles > Options > Reset styles.

3. Utilizing Collapsible Headings
In a pageless format document, enhance readability by expanding or collapsing titles and headings. Remember, anyone with access to the document can adjust these headings.
- Access a pageless Google Doc.
- Hover over the desired heading.
- Click on the arrow icons to either Expand heading or Collapse heading.
4. Managing Multiple Headings Simultaneously
For those with extensive headings, you can conveniently collapse or expand all headings of a particular style.
- Open a pageless Google Doc.
- Right-click on a heading.
- Choose either Expand all headings of the same style or Collapse all headings of the same style.
This guide provides detailed steps on adding, editing, and managing titles, headings, and tables of contents in a Google Doc. Ensure smoother document navigation and a better reader experience.
In summary, we’ve covered various methods on how to make a table of contents in Google Docs. From how to create a table of contents in Google Docs to the nitty-gritty details of how to add a table of contents, we hope this guide has been invaluable. Whether you’ve been interested in how to do a table of contents, how to insert one, or the broader aspects of creating or making a table of contents in Google Docs, we’ve got you covered. Thank you for sticking with us, and we hope you find adding a table of contents in Google Docs to be a simpler task moving forward.


